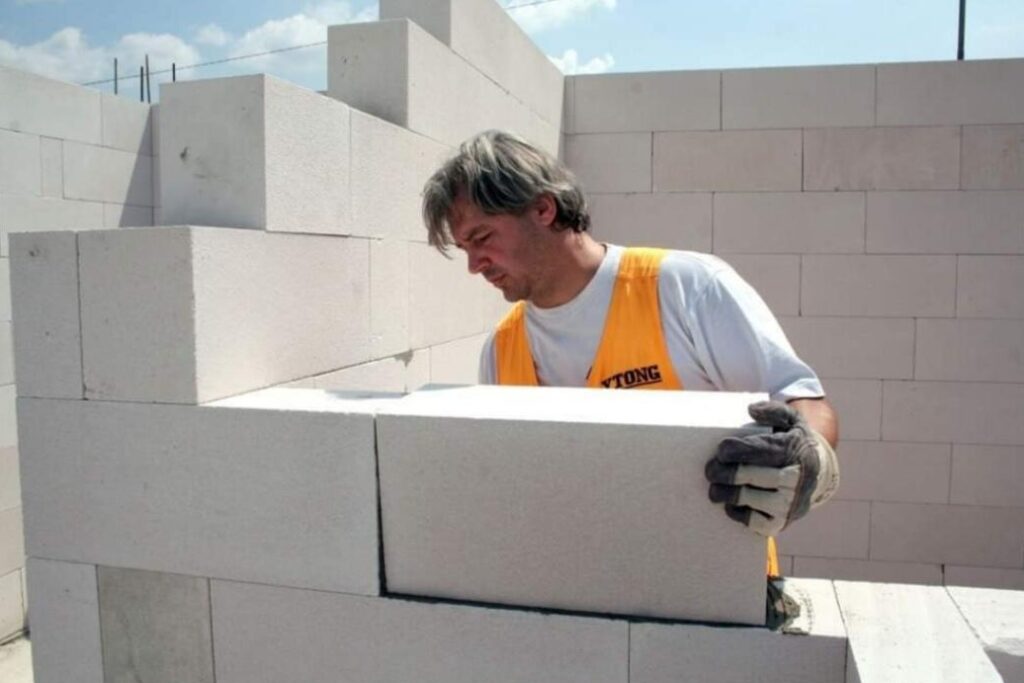
First: The site is well prepared and all necessary tools are equipped before starting work on the site and the bricks are stacked correctly to reduce waste and facilitate transportation and handling during the construction process.
Second: The bricks must be sprayed well with water before construction so that they do not absorb the water in the mortar, as the light bricks are cement-based in addition to being porous in composition and require treatment with water like concrete and other types of bricks.
Second: The steps for building Thermstone bricks
Third: To avoid cracks in the short or long term, it is forbidden to mix the construction of any type of brick with the light brick in the same wall because this leads to a lack of homogeneity due to the difference in expansion and contraction coefficients, which causes cracks in most parts of the wall. Also, using different types with the light brick reduces the efficiency of thermal insulation and fire resistance that light bricks are characterized by.
Fourth: The bricks must be stacked near the walls that will be painted in order to facilitate the construction worker and save time. Care must be taken to mix and stir the mortar well and not to ferment an excessive amount.
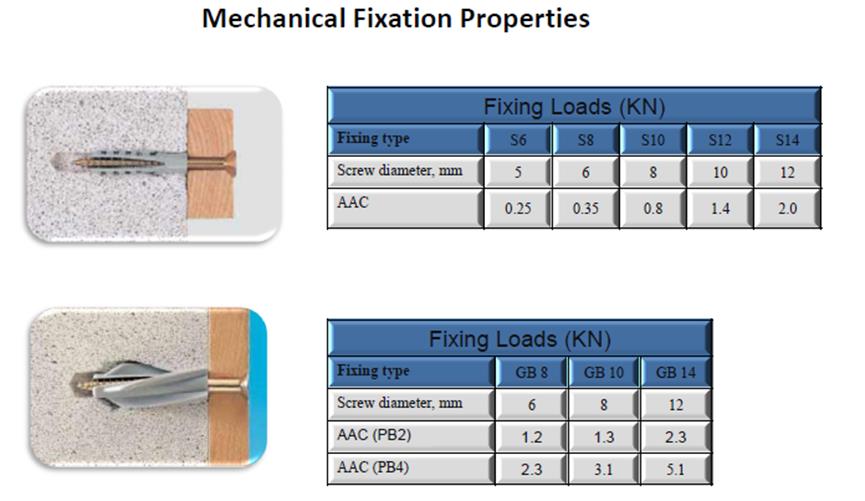
It is preferable to fill the seams between the bricks using:-
Thermoplaster mortar: prefabricated cement mortar bags mixed by adding 7-8 liters of water to one bag (25 kg) to be sufficient to fill the seams of a cubic meter of light bricks. It is executed with a thickness of 3-4 mm. . Using a special type of ruler.
Regular mortar: (cement, calcium carbonate and silica in a ratio of 1: 2: 3. Lime is added to the mixture at a rate of 10% of the cement - and it is recommended to add long-chain polycarboxylic polymer chemical additives to the mixing material to increase the cohesion strength of the mixture and is added at a ratio of 10: 1 of the mixing water.
Ready-made mortar: The pre-prepared mortar is mixed in the required quantity manually or mechanically in a container designated for mixing (barrel-tekne-bucket-…) for 2-3 minutes until it reaches the desired consistency, and is left for a period of 5-10 minutes.
It is also possible to use:
The pre-prepared mortar is mixed in the required quantity manually or mechanically in a container designated for mixing.
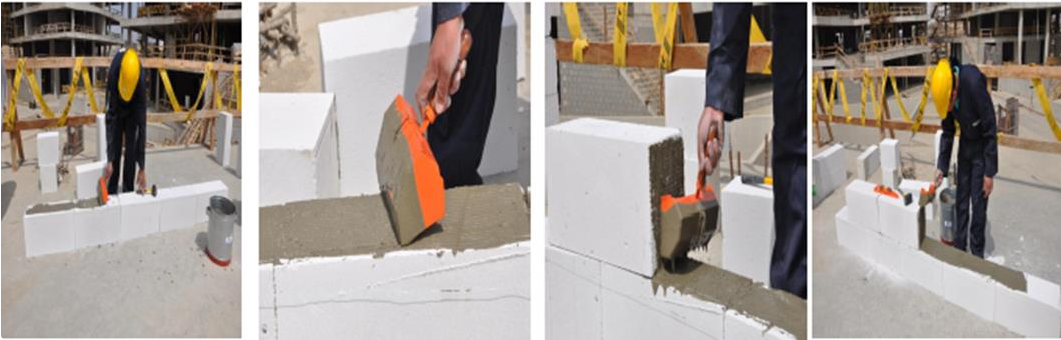
Fifth: After spraying the bricks and preparing the mortar, we begin the brick building process easily, but in the first course, it is necessary to prepare the surface to be built on and ensure that it is clean and free of dust or other materials, then Adjusting the horizontality of the first course using regular mortar (to control the thickness of the welding layer between the brick and the concrete surface to ensure the horizontality of the course). A water level or similar is used to adjust the horizontality of the first course and the brick is fixed using a rubber mallet.
Sixth: Construction is carried out in the traditional way (sharing) so that horizontal lines are tightened for every two courses at most, and a shaghol thread level is used every three courses at most to ensure that they are at a vertical level, and a pole that cannot be less than 3 meters long is used in all directions to ensure that one course does not protrude from the other, which causes sagging in the plaster. Because the dimensions of the light porous brick are very precise, they help facilitate the process of laying the bricks and straightening the construction courses well and at high speed.
Steps for building with light porous bricks
Eighth: A metal mesh or fiberglass is used to the width of the brick along the course every five to six courses and tied by pressing the columns or concrete at the beginning and end of the course.
Ninth: After completing the construction, make sure that all (welds) are filled in order to ensure the highest quality of the wall (the wall is well lined).
Tenth: The blocks are cut using a saw or using a cutting knife with adjusting the verticality of the cut and using the iron angle in order to easily obtain the dimensions to be cut, whether for the wall, closures, or for grinding, and also to reduce waste.
Eleventh: When making electrical extensions or sanitary works, an electric rocket is used to determine the dimensions and depth of the openings, and then the removal and creation of the required cavity is done using a chisel. You can also use the special manual drilling machine provided by the company through the technical support service, and you can also use special mechanical equipment to open drains in the walls. Direct chisel breaking is prohibited, as is the case in some locations, to prevent random wall breaking that weakens the efficiency of the bricks. Make sure to spray the surfaces with water after making electrical or sanitary openings, before plastering. Twelfth: Any type of door or window frames (wood or iron) can be easily installed using black roll nails after spraying them with an opoxy layer (mechanical or chemical), taking into account spraying the surfaces well with water. It is also possible to install building work accessories (mesh wire and cans) in the case of using regular mortar.
Thirteenth: Before starting the plastering preparations, the wall is sprayed with water.
Fourteenth: The splashing is done in the traditional way and using mortar in the usual proportions, provided that it is a rough and sharp splash.
Fifteenth: The accessories for soft plastering work (mesh wire and bullets) must be used at the joints between the concrete and the walls. Chemical materials such as polyurethane or similar can also be used to avoid cracks in the joints between the bricks and concrete.
Sixteenth: The soft plastering is done in the traditional way, provided that the filling is done in stages to avoid cracks resulting from soiling.